There are a group of editing features that apply to most or all of the document. These can be described as document-level editing tools.
There is a level before this: Section-level. However, we are not going to learn the specifics of this in this class; it is a somewhat advanced tool in Microsoft Word.
You will find the Page Setup controls in the Layout Tab in the Ribbon:
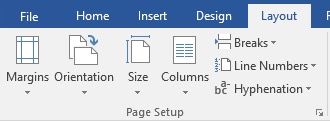
This is where you can make Document-Level Changes.
You can set Margins:
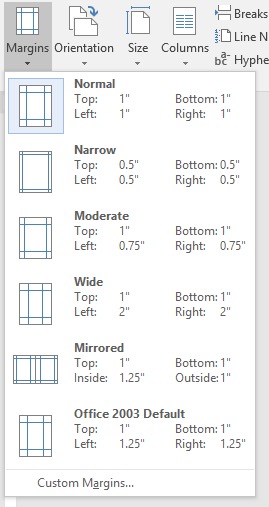
Either choose one of the preset margins, or click on "Custom Margins" at the bottom of the menu.
Margins for an MLA-style essay are 1 inch on all sides. If your version of Word is set to centimeters, you can simply type in 1" (a one followed by a double quote) and it will be understood as "one inch."
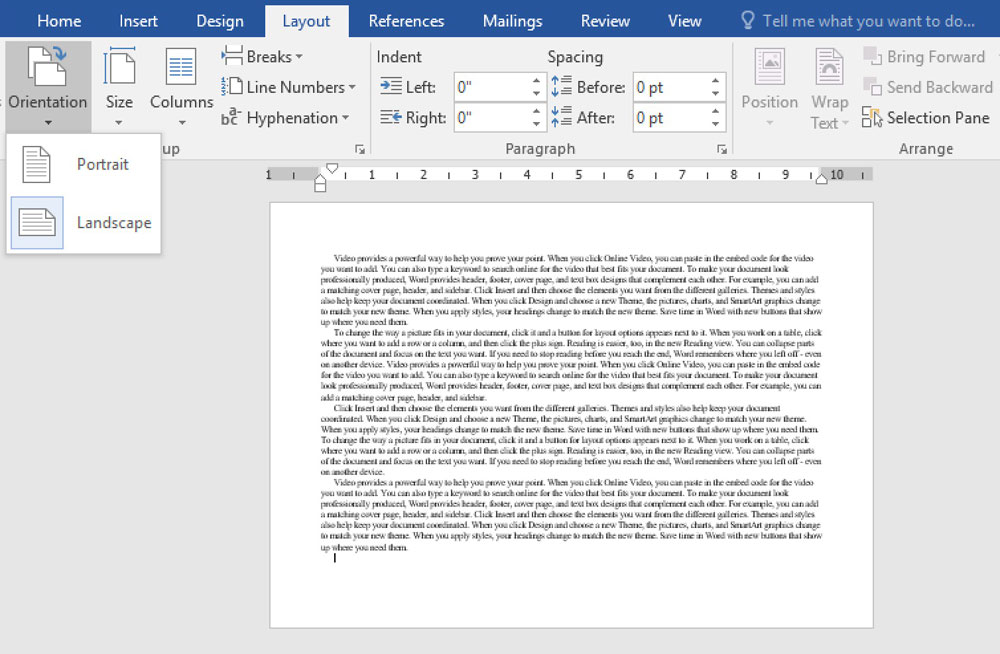
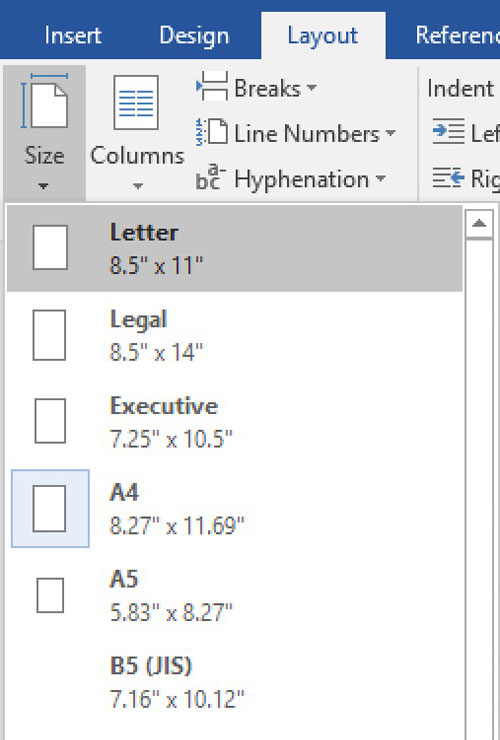
You can also set:
- Orientation: Set to Portrait (vertical) or Landscape (horizontal);
- Size: Set to Letter, A4, or other paper sizes;
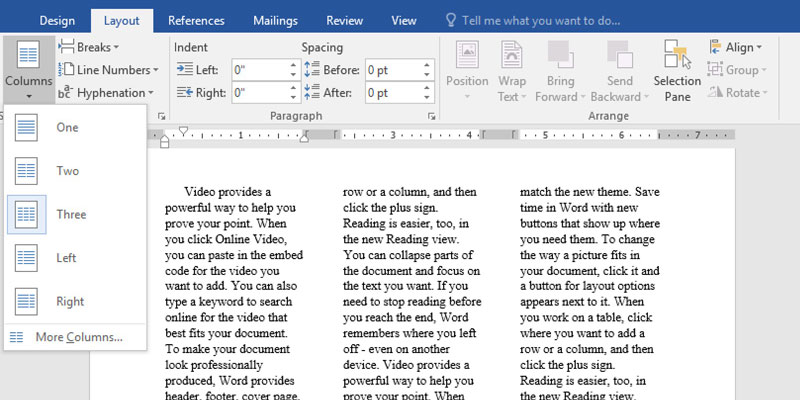
- Columns: Break your writing into vertical columns:
Orientation is usually "portrait," but it used in "landscape" for things like signs & posters.
Paper size is usually A4 in Japan, but in the United States, "US Letter" (8.5" x 11") is the standard.
Columns is not something you should normally use; it is better used for creating pamphlets or newsletters. It is extremely rare in academic writing.
The text you select will be changed to however many columns you decide. If you select only one or a few paragraphs, they will be changed to columns while the other text will stay as it is.
You can also choose three other features:
- Breaks: Allows you to end the text before the end of one page, and then start the text again at the top of the next page. This is much better than using the "Enter" key many times until the cursor reaches the next page. Breaks allow you to jump to whatever is the next page; if the text on a previous page is edited (made longer or shorter), it does not affect the text after a break.
- Line Numbers: You can add numbers to the side of each line, if you wish; used only in special circumstances.
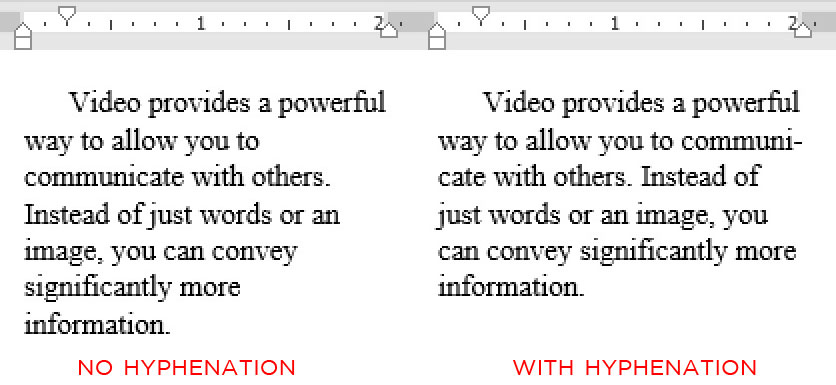
- Hyphenation: Without hyphenation, words always remain whole; this, however, sometimes leads to large blank spaces at the end of lines. Hyphenation breaks words up at syllable breaks, making those gaps smaller. This makes the text look better with left-alignment—however, the MLA style does not allow hyphenation to be used.
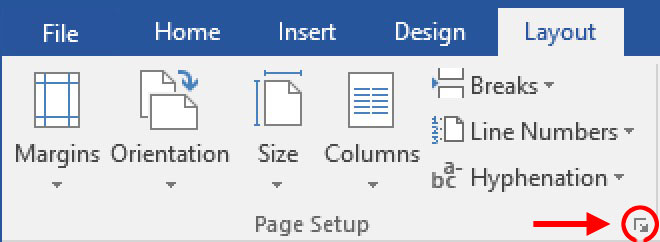
The Page Setup Dialog Box
If you click on the button at the lower-right corner of the Page Setup area, the Page Setup Dialog Box will open.
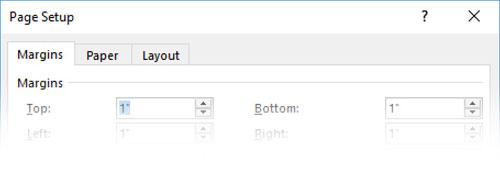
The first tab at the top allows you to set Margins:
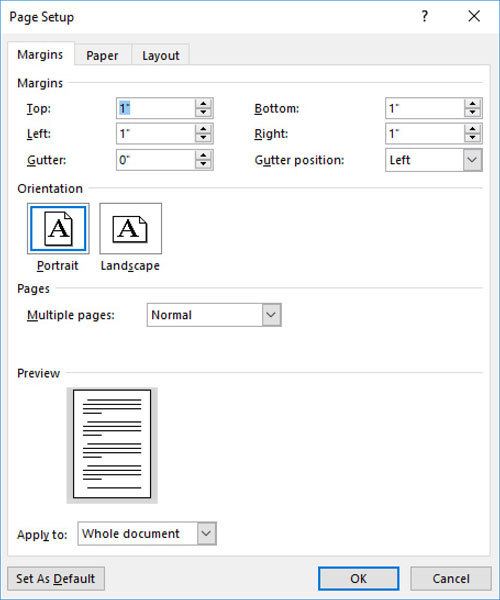
The first section controls the Margin setup. The Top, Bottom, Left, and Right margins control the amount of space between the edge of the paper and the boundaries of the text. MLA format has 1-inch margins on all four sides.
The Gutter, which we will not study in this class, is a special feature when printing in book or booklet form, adding space to the inside of a page (on the left for odd-numbered pages, and the right for even-numbered pages) to allow for the book's binding.
Next is Orientation, which allows you to set the paper is positioned. Portrait (standing up) is the normal orientation; Landscape (wide) is often used for posters and signs.
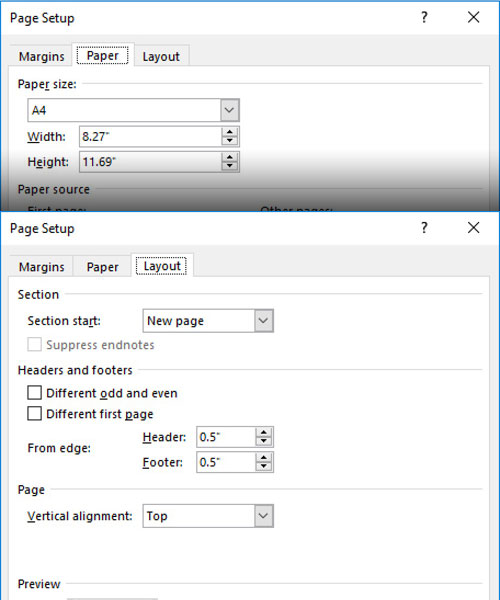
In the Paper tab, you can choose the paper size you will use. Either select from a list of standard sizes, or set the exact height and width manually.
If your printer allows it, you may also choose the printer tray from which the paper is fed.
In the Layout tab, you can control how Sections begin (again, we will not study sections in this class).
Additionally, you can control Headers and Footers. If you will print in book form, with double-sided pages, you will need Different odd and even headers and footers, mostly because page numbers appear on the outer edge of the paper, not on the binding side; therefore, odd-numbered pages (which should always be on the right side of the open book) require page numbers on the right side, and even-numbered pages are the opposite. In some books, odd and even pages also have different information--for example, the book title, the chapter title, or the author's name.
Here are the main format settings for a standard MLA-style academic essay.
Document-level settings (Page Setup):
- Paper Size is set to the national standard (US Letter in the United States, A4 elsewhere)
- Margins are 1 inch on all four sides
- Header requirement is to have your family name followed by a space and the page number at top right, on all pages
Paragraph-level settings (Paragraph):
- Line Spacing for the whole document is double-spaced
- Paragraph Spacing should be set to 0 both before and after
- Paragraph Alignment is Left Align, except for essay and Works Cited titles, which are centered
- Indents are 0.5" first-line for essay paragraphs; 0.5" hanging for Works Cited entries; and no indents for all other text.
- Widow and Orphan Control should be on
Character-level settings (Font):
- Font should be Times New Roman
- Font Size should be 12pt
Other Specifics:
- Blank Lines: There should be no extra blank lines or extra spacing anywhere in the essay
- Italics: Titles of any larger work should be in italics, with Title Capitalization (see MLA 3.6.1)
- Works Cited: The list should begin at the top of a new page after the end of the conclusion (use a Page Break); there should be a centered title (Works Cited) followed by the listings.
There are several differences between the Japanese and English versions of MS Word which can cause problems in English-language essays. Here are four common problems and their solutions:
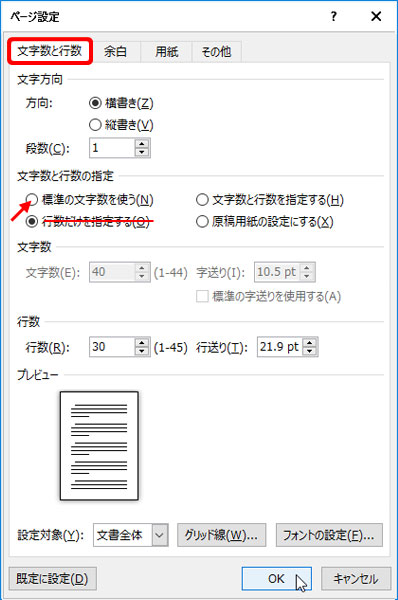
- Line Spacing: Asian-language line spacing is a bit wider than Western-style spacing. If you use the Asian style, your American teacher may think you are trying to cheat by increasing the spacing and therefore creating "extra" pages.
SOLUTION: Go to the Page Setup Dialog Box (you can also open it by double-clicking on the ruler in the left or right margin). In the normal English-language version, there are only three tabs:
- Alignment: MLA Style calls for Left Alignment, except for titles. Japanese MS Word automatically uses Justified Alignment; in fact, the "Left Alignment" button may not even be on the toolbar!
SOLUTION: Change to Left Alignment, using the Paragraph dialog box if necessary.
- Widow/Orphan Control: Japanese MS Word has Widow/Orphan Control turned off by default. As discussed in the previous chapter, Widow & Orphan control prevents a single line at the top or bottom of a paragraph to exist separately on a preceding or following page.
SOLUTION: Go to the Paragraph dialog box, and turn Widow/Orphan Control on. CAUTION: this is a paragraph-level change, so you must select ALL PARAGRAPHS in your document before doing this!
- Paper Size: In Japan, A4-sized paper is used. In America, "Letter" (8.5" x 11") sized paper is used.
SOLUTION: Be careful to use the right setting depending on what paper size you use. When you travel between the United States and other countries, be sure to set the correct paper size and make it permanent with the Default button.
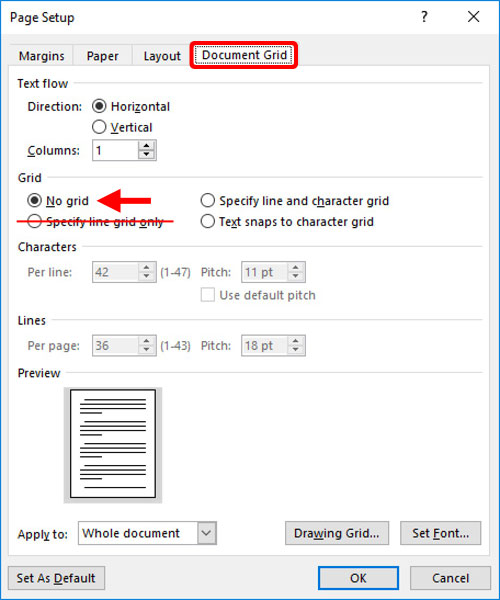
In the Page Setup dialog box in Asian-language MS Word, you will find a fourth tab at the top, called Document Grid. In Asian spacing, the Grid is set to "Specify line grid only." To fix the spacing, change this to "No Grid". To make this setting permanent, click on the Default button and make the change.
All of the above will happen again and again, every time you make a new document. To make these changes permanent, use the "Default..." button at the lower left corner of the Page Setup/Paragraph/Font dialog box.