Animation
This is the fun part of PowerPoint—but also the complex part: Animations of objects. You can make just about any object move in and out and fly around and gesture in almost any way you can imagine.
Below is the Animation tab in the Ribbon.

At the far left, there is a button to preview animations. We'll get back to that later.
Next to that, there is a long window with many aimations in it. You can click on the small buttons on the right side of this area to see a whole menu of animations. Howere, I recommend that you do not use this menu to apply animations. The reason is that it will only apply one animation to an object; add a second one from here, and the first one disappears.
Instead, it is easier and better to simply use the Add Animation button, outlined in yellow in the image above. This button can do everything, and never erases previous animation settings. Always use this button to create animations.
By clicking on the Add Animation button, you will see a selection of various animations:
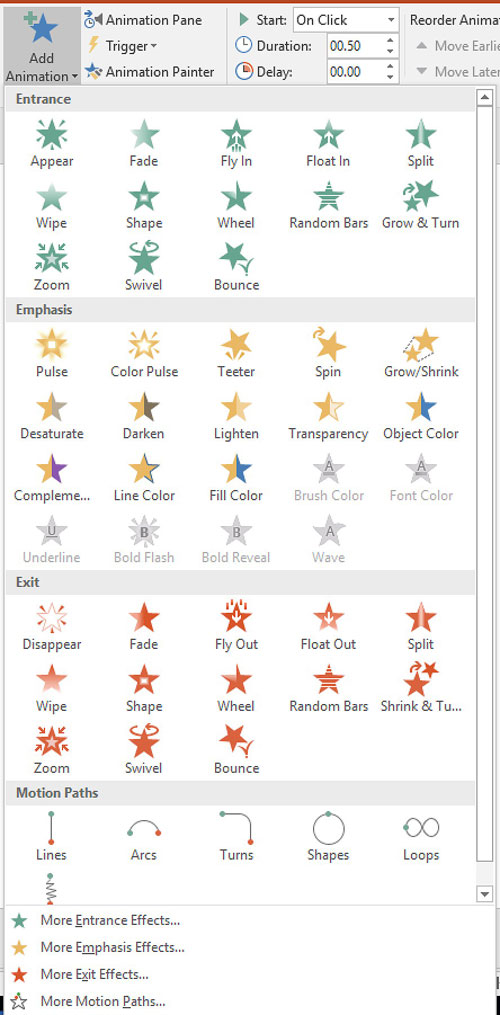
Notice that there are four animation categories:
- Entrance: Makes an object enter a slide from the outside
- Emphasis: Makes an object do something while staying in the same place
- Exit: Makes an object leave the slide
- Motion Paths: Makes an object move from one location to another location
The menu offers several animation choices in each category. however, each category actually has dozens of different animation choices. To see all the possible choices, click on one of the More ~ ... selections at the bottom of the menu.
Applying an animation
To animate an object, you must select it. Then, in the Animation tab, click on Add Animation. Then select the animation you want.
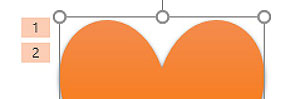
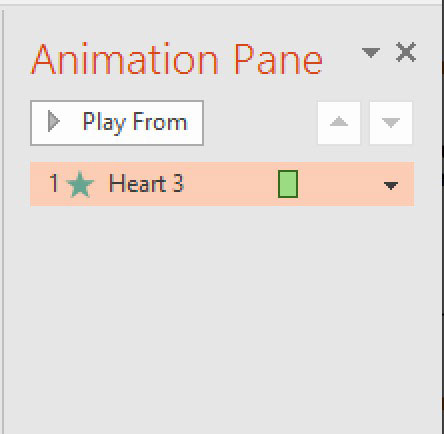
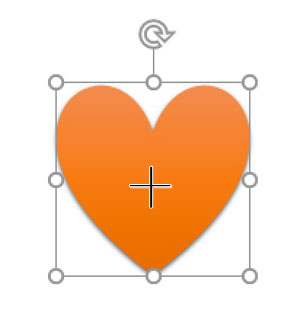
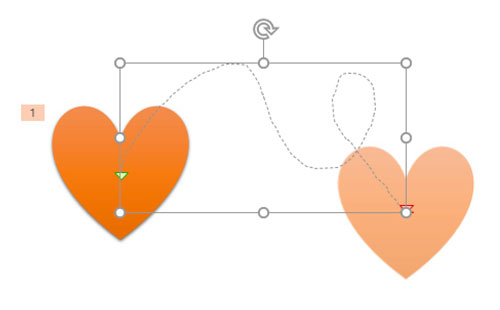
In the example below, I added a Fly In animation to a Heart shape:

Note two effects:
- A square with a number "1" appeared at the top left of the shape; and
- The "Effect Options" button became active.
The square with the number shows the order of animation. Since this is the first animation, the number 1 appears.
If I add a second animation to the same heart shape, a "2" appears as well, marking this shape as having the first and second animations on the slide.
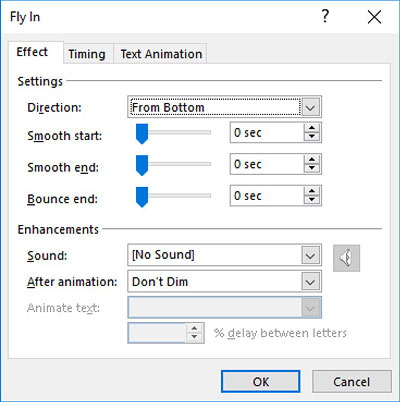
The Effect Options button allows us to change the nature of the animation. If you click the "Preview" button, you will notice that the heart flies in from the bottom of the slide.
In the Effect Options menu, we can choose a different direction:
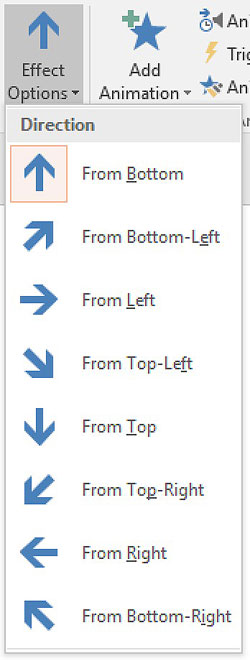
The Effect options are different for different animations. Some animation types have no options; others have a few different options. Check the menu to see what is available each time.
Try out various effects and options in a PowerPoint file to see what the animations look like. Play around a bit, and discover.
NOTE: When giving your slide show, each animation is triggered by a mouse click. Alternately, hitting a keyboard key—usually the space bar—will have the same effect. The right arrow key will do the same thing also, but the left arrow key will make the animations go backward.
The Animation Pane
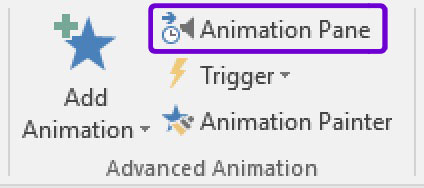
Note that in the "Advanced Animation" group, there is a button marked "Animation Pane." Click on that. You will see a pane appear on the right side of the screen:
Whenever you add an animation, it will appear in this list. Inserted sounds and movies will also appear here. They will appear in the order that they play on the slide, from top to bottom.
Double-clicking on any one animation in the pane will cause a dialog box to appear, with options for that one animation.
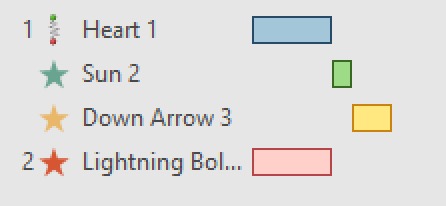
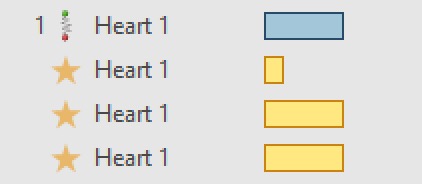
When there are multiple animations, they appear, color-coded, in list form.
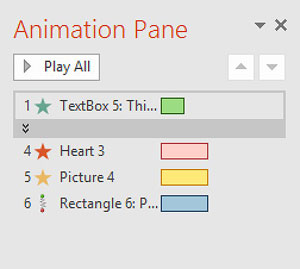
Notice that each category of animation has its own color: green for entrance, red for exit, yellow for emphasis, and blue for motion path. The bars next to the animation name indicate the duration for each animation.
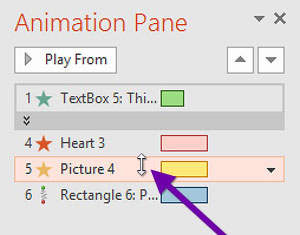
Any animation in the list can have its order changed by clicking and dragging the item.
Text Animation
When you have text in an object, that text can be animated.
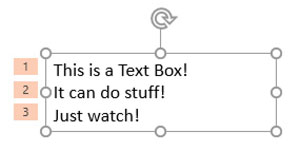
Notice that in the image above, there are three animation notations—one for each paragraph. You can animate the whole text box all at one, or have one paragraph come in at a time:

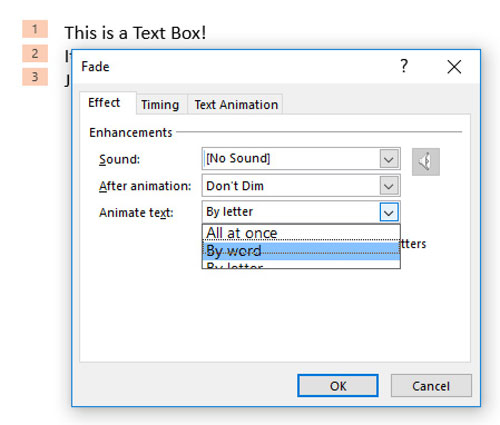
The text animation appears specially in the Animation Pane; click on the double-down-arrows to see the whole list:

In fact, if you double-click on the text animation item in the list, you can even have the text appear word by word, or letter by letter. Oddly, this is not under the "text animation" tab, but just under the simple "Effect" tab:
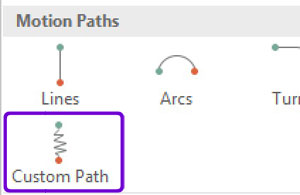
Motion Paths
One of the animation categories bears mentioning: the motion path. Most motion paths are pre-set shapes that you can choose from, but there is one very useful option: the custom path.
This allows you to make an object move in exactly any way you want it to.
You can use it by selecting the tool, and then moving the cursor over the object you want to move. Click and drag the cursor to draw the animation path. It is important that you begin drawing from the center of the object; if you do not, then the animation begins by suddenly jumping to the location where you began drawing a line.
You can let go of the cursor while drawing the line; the path will not be completed until you double-click at the end point.
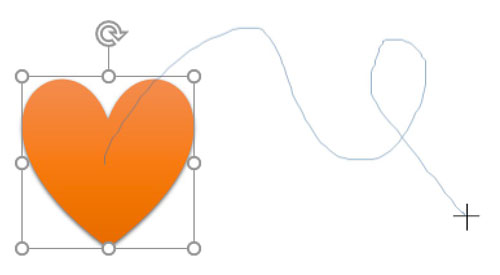
After you double-click to end the path, the whole path will appear, with the object ghosted at the end of the path.
Ordering & Grouping
Normally, to make an animation happen, you have to set it off—click on the mouse button, or hit a keyboard key. However, animations can be grouped together and made to appear automatically, without prompting.
These are set by the Start option in the Animation Timing. You can see the timing in the Ribbon, in the Timing group, or by clicking on the menu arrow in each animation in the Animation pane list:
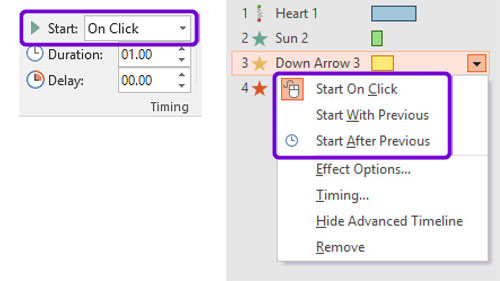
There are three settings:
- Start On Click: animation begins when you click the mouse or hit a key
- Start With Previous: animation begins at the same time as the previous animation
- Start After Previous: animation begins immediately after the previous animation ends
Using Start After Previous allows animations to happen automatically, one after the other, with no clicking by you.
This is very convenient, but do not make all of your animations like this; too much automatic animation means that if your spoken presentation takes longer or shorter than you expected, then the animations will not match your speaking.
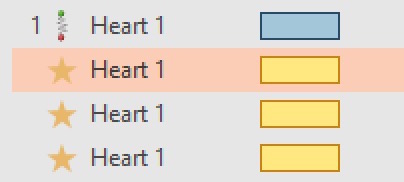
Notice that when you group animations to start automatically after one another, they appear differently in the Animation Pane. The animations set to begin automatically do not have a number (the number shows when you click only), and the color bars line up to show the sequence.
Using Start With Previous effectively joins two animations into one combined animation; both will happen at the same time.
This can be used in two ways: (1) to make two different objects animate together, or (2) to make one object display multiple animations at the same time.
The first is easy: choose any number of animations, and have them happen in sequence (no other animations between them). Set the first one to "On Click," and then set all others to "Start With Previous."
The second way is a little more difficult. To make one object display several animations at the same time, you must select the animation types carefully.
You can use use "Start With Previous" on one object only with Emphasis animations, plus only one of the other animations.
Entrance, Motion Path, and Exit animations each have a specific starting point an ending point. They cannot be combined. You cannot enter and exit a place at the same time!
However, Emphasis does not make the object move anywhere, so you can combine several of these together.
As a result, you can have (1) one Entrance and one or more Emphasis animations, (2) one Motion Path and one or more Emphasis animations, (3) one Exit and one or more Emphasis animations, or (4) multiple Emphasis animations, combined together with the "Start With Previous" setting.
To do this, the animations to be combined must again be grouped together. Leave the first animation as it is, and then set all subsequent ones to "Start With Previous." Again, only one can be something other than an Emphasis animation:
Notice that in the example above, one of the animations is shorter than the others. If you like it that way, you can keep it, but it might work better if all the animations have the same duration. Just select the animation with the different timing, and change the duration to match the others.
Previously, you learned about how to insert sounds. In that case, sounds are objects on the slide, which appear as icons.
A Sound Effect is different: it is a sound which is added to an animation of some sort. An animation sound effect is not the same as an inserted sound:
- A sound effect is not an object
- A sound effect idoes not appear anywhere on the slide
- A sound effect is part of an animation
- A sound effect must be a .wav file; nothing else will work.
To use a sound effect, double-click on the animation in the Animation Pane. when the dialog box opens, make sure you are looking at the Effect tab. The option for sound effects is under "Enhancements":
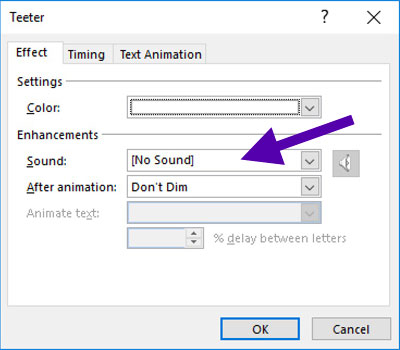
Click on the menu to see a dozen or so built-in sound effects. You can use these, but they are old and uninteresting.
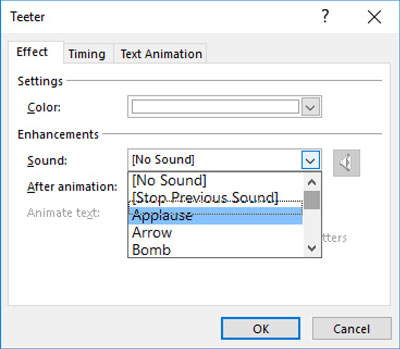
At the bottom of the list, however, you can select Other Sound...

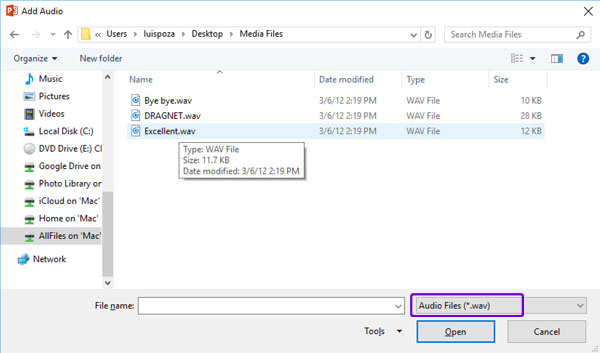
This opens up a dialog box which allows you to find your own sounds. Note that the sounds must be in the .wav file format. This is the only type accepted by PowerPoint for sound effects.
Note: if you have two animations that start "with" or close to each other, the sound of the previous effect will be erased or overridden by the later sound effects.
Have you ever seen a Star Wars movie? If so, you probably noticed that they use "wipes" between scenes—that is, instead of simply fading or cutting to a new scene, they use some interesting shape to transition from one scene to the next.
Transitions can be better than simple cuts because they give a feeling of motion from slide to slide, almost like turning a page in a book. The transitions give a feeling of connection between the slides.
Transitions have their own tab in the Ribbon:
You can select a transition from many that can be found in the large window inside the "Transition to This Slide" group.
Most are not visible right away. At the right side of that window with transition buttons, notice a few smaller buttons along the edge.
The one at the bottom will open the whole transition menu.
Keep in mind that a transition happens from the previous slide to the slide with the transition. If you put a transition on Slide #2, the transition will happen between slides #1 and #2. If you put a transition on the first slide, the transition will go from a black screen to the first slide. In order to place a transition on the final slide, add an extra blank slide and make the background black, then add a transition to that slide.
Just like with animations, you can add sound effects to your transitions. Again, these are sound effects, and not inserted sounds; they must be .wav files, and are not objects on the slide.
You can also set the duration of the transition; often, it is good to match the duration of the transition to how long the sound effect is.
You will also note that there is a setting to automatically advance the slide "After" a certain number of seconds. That means that the slide will advance to the following slide after however many seconds you set. I would advise against using this. It is very common for presenters to change their presentation a little each time. Unless your timing is perfect, it is too easy to get out of sync with an automatically advanced slide set.
Here is another practice PowerPoint file you must make. The teacher will give you the media files you need in the class.
You must create a PowerPoint file with the following:
- Step #1: Add an inserted MP3 sound to the first slide. Make it Play in Background.
- Step #2: Give the first slide a gradient background.
- Step #3: Add a Word Art; make the text say, "PONTA!"
- Step #4: Go to the slide master. Click on the top (large) slide.
- Step #5: Add an Online Picture; choose any image of a dog. Make the image small, and put it in the top left corner.
- Step #6: Exit the slide master.
- Step #7: Create a New Slide. Give it a solid color background.
- Step #8: Add the image of Ponta on the new (second) slide. Resize it so it is about half the height of the slide.
- Step #9: Add any Entrance animation, then a Motion Path animation, then an Emphasis animation, and finally, an Exit animation.
- Step #10: Add the provided .wav sounds as animation sound effects (not inserted sounds!!!) to the Entrance and Exit animations ONLY.
- Step #11: Make the Motion Path and Emphasis animations happen at the same time.
- Step #12: Add a transition between slides 1 and 2.
Save the file with the name yourname PPT-5.pptx. Bring the PowerPoint file to the class session your teacher tells you to.